

Intro
Today our web browsing experience is largely populated by images and photos. While this is beneficial and visually stimulating, having large amounts of unoptimized images can steer viewers away from a website. Images being too large, image files taking too long to load, or images not loading properly are all issues that can negatively effect your website user's experience. Here is a tutorial that will help you create the most efficient images for your website:
For this tutorial we will be using GIMP to prepare and optimize our images. The guidelines aren’t restricted to but will be shaped around GIMP. There are a number of other software titles that can achieve similar results. The general idea and procedures are the same across each software title. Continue to the bottom for a list of software suggestions.
Images are too large
One of the biggest issues with images on websites is that many website administrators do not resize their images before uploading. Images that are too large can take up too much real estate, add unnecessary download time, and make your website difficult to view.
Follow these instructions to resize your images:
1. With your image open, go to Image > Scale Image from the main menu.
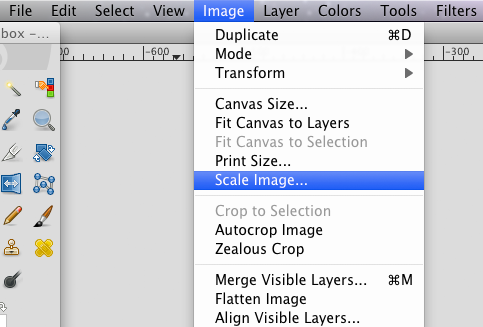
2. In the dialogue box that appears resize your image accordingly by changing the Image Size width and height.
QUICK TIP:
You might be asking “what size should I save this as?"
To be honest, there’s no simple answer.
What size you use all depends on each individual image and how that image should appear on your website. Ideally images are resized to conform with the overall design of your website. If you do not know the exact size needed consider resizing to an approximate size. Next you want to resize accordingly until satisfied.Here are some useful sizes as reference.
If you are still lost consider contacting the web professionals at Design Brooklyn for help.
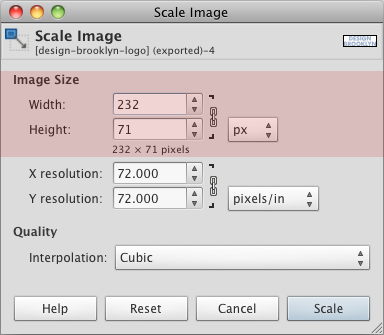
3. In the same dialogue box you want to make sure the X & Y resolution is set to 72 pixels per inch (higher resolutions will contain more pixel data than can be displayed on most screens).

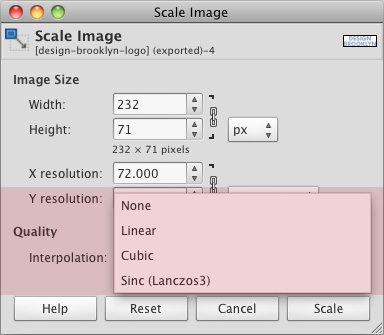
4. When scaling an image, pixels are either added (enlarged) or removed (reduction), the drop-down of Interpolation are the methods used by GIMP for processing this which also determines the quality of a scaled image.
Note: The default method, Cubic, is recommended if you don't know which method to choose.
Linear: "This method is relatively fast, but still provides fairly good results."
Cubic: "The method that produces the best results, but also the slowest method."
Sinc (Lanczos 3): "New with GIMP-2.4, this method gives less blur in important resizings."
Read more: http://docs.gimp.org/en/gimp-image-scale.html
4. Click Scale after you've set all your preferences.
Your image is now successfully resized for website use.
BUT — before you upload, be sure to save your image for the web.
Save for the Web
Now that your image is at the proper size and resolution, you’ll want to optimize the image and rename the file to conform with web standards. Image optimization helps to reduce your image’s file size which can dramatically decrease image load time and keep your website visitors happy.
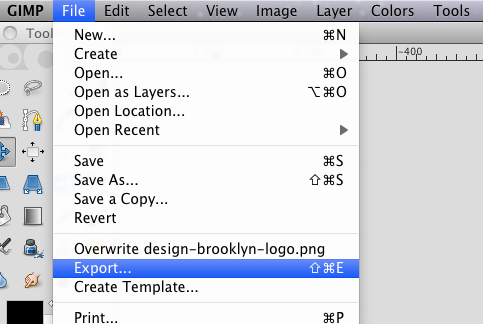
1. After properly resizing your image, go to File > Export.
2. A dialogue box will appear, you'll first want to pick a location to save the image, then enter an appropriate filename to save the image as.
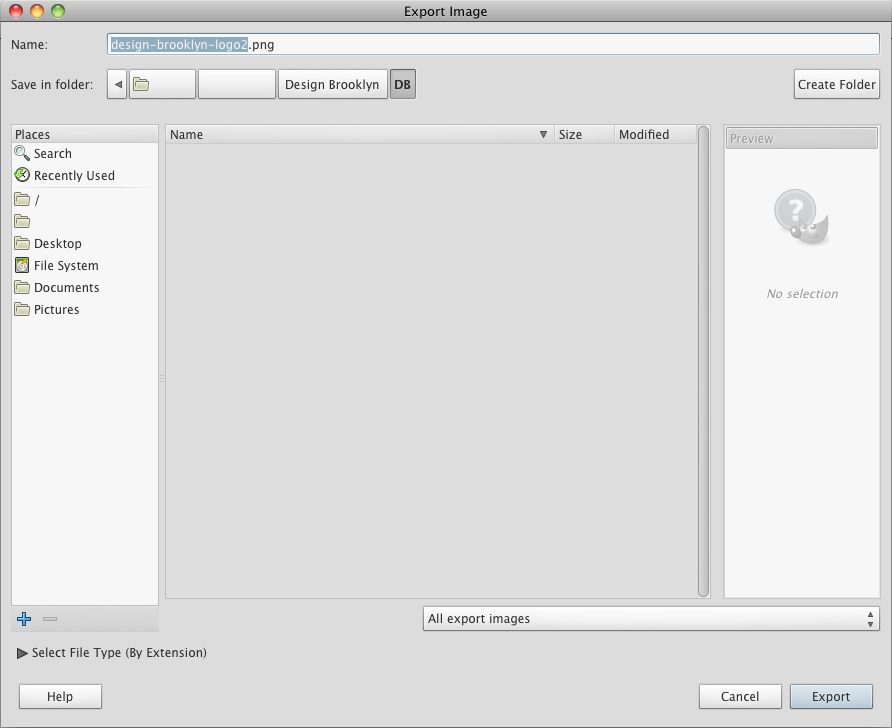
3. In the same dialogue box you also want to specify the file type (extension) so that you save the image in the most suitable format.
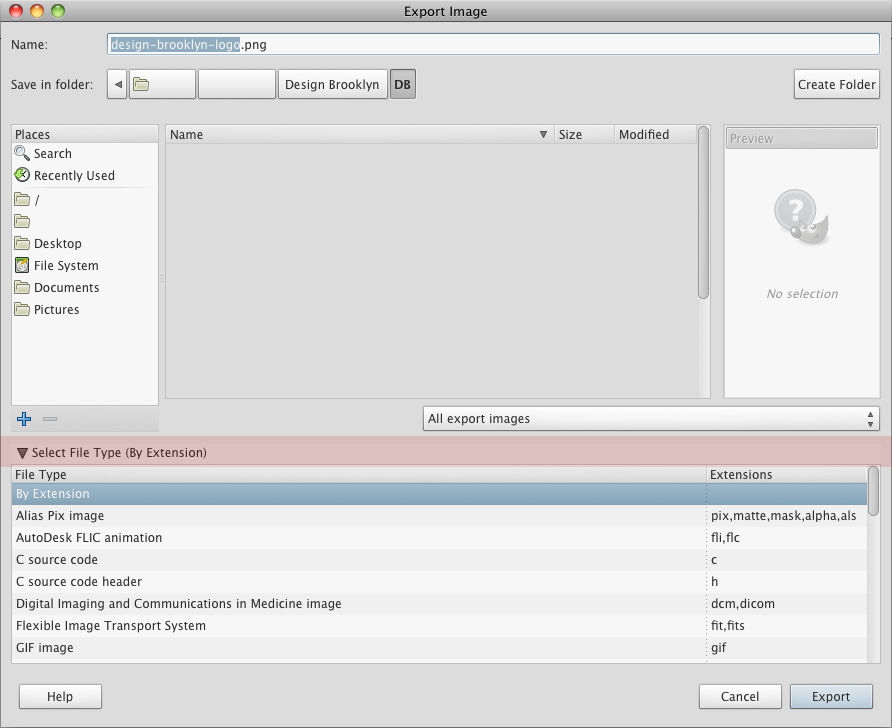
Choosing the right file format will greatly affect how your images look on your website. For some images choosing the wrong file format will render it to not load properly. For example if you used .jpg for an animated image or if your image has more colors than the file format can handle.
Here are details for a few formats we recommend using:
 | .gif GIF is great for simple graphics like logos, shapes, patterns and solid colors. It allows for transparency but only supports 8-bit or up to 256 colors so it isn’t recommended for realistic photos or images that have a high range of colors. GIF also supports animated images but be aware that long animations will result in larger file sizes. |
 | .jpg JPG or JPEG are ideal for photorealistic images, it supports 24-bit or up to 16.7 million colors but doesn’t support transparency. |
 | .png PNG is very similar to GIF in it’s functions except for animation. While PNG-8 offers the same amount of color support as GIF (8-bit/256 colors), PNG-24 offers up to 24-bit or 16.7 million colors. PNG-24 also offers alpha transparency unlike other formats which allows for variable opacity to achieve more realistic effects such as transparency around shapes and curves as well as shadow and glow effects. |
 | .wbmp WBMP or wireless bitmap format is used for mobile phones, it only supports 1-bit or 2 colors (grayscale). This format is generally not recommended. |
4. After selecting a suitable format for your image go ahead and click Export.

5. Depending on the format you've chosen, the dialogue box that appears next will be different. There are different settings that you should keep in mind before exporting for each format.
Note: In general the default settings are a good starting point if you don't know which settings to change.
Settings to keep in mind
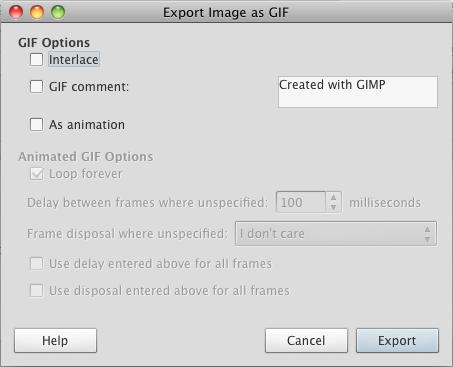
If choosing GIF:
As animation: Saves any animations that were created.
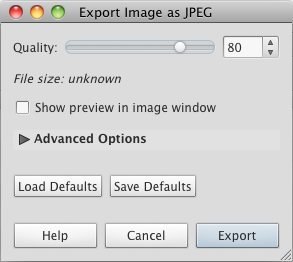
If choosing JPG:
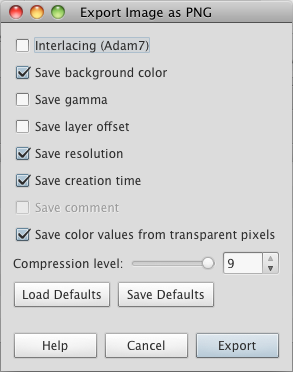
If choosing PNG:
Gamma: Gamma correction is a feature that is used to correct differences in how different computers interpret colors values. By selecting Gamma, gamma information is stored in the PNG and used to ensure images are not too dark or too bright on different computers.
Compression Level: The higher the number the smaller the filesize.
4. Click Export after setting all the appropriate settings.
Now your image is properly optimized to upload to your website. As an added bonus, your resized images should upload much more quickly!
Software suggestions:
Adobe Photoshop or Photoshop Elements (cross platform)
GIMP (cross platform)
Corel PaintShop Pro (Windows)
Paint.NET (Windows)
Seashore (Mac)